RDS を触ってみる
注意事項
本課題で作成するAuroraは動作させておくとクレジットの消費が激しいです。
そのため、Lab終了時には Aurora を停止するようにしてください。
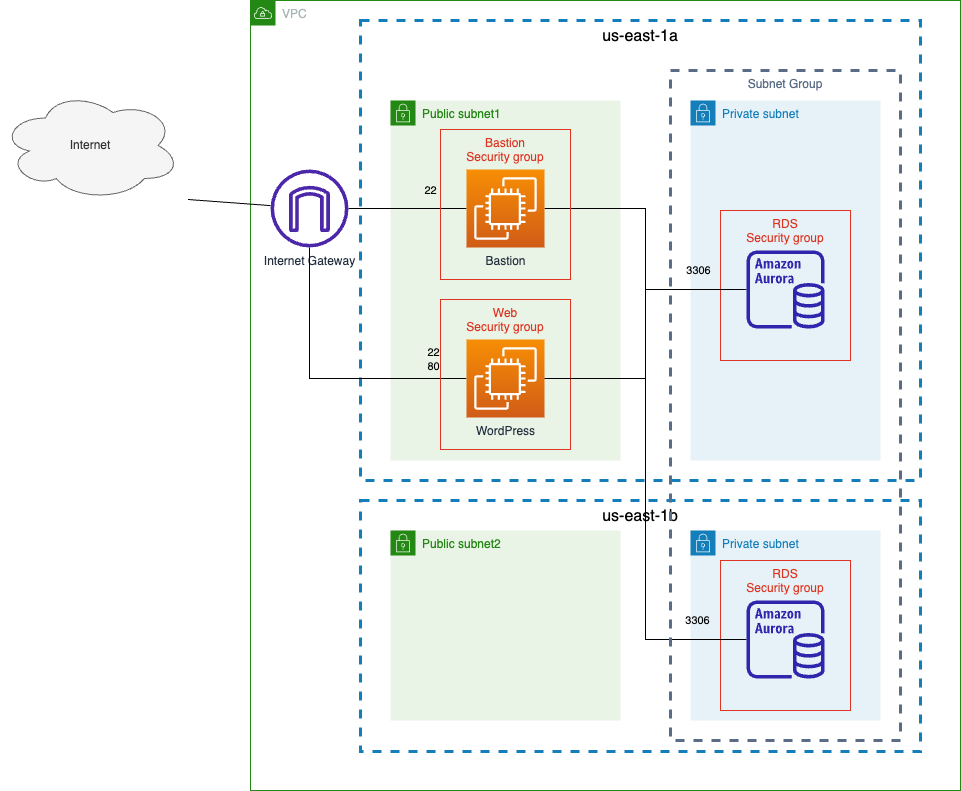
この課題で作成するシステムの構成
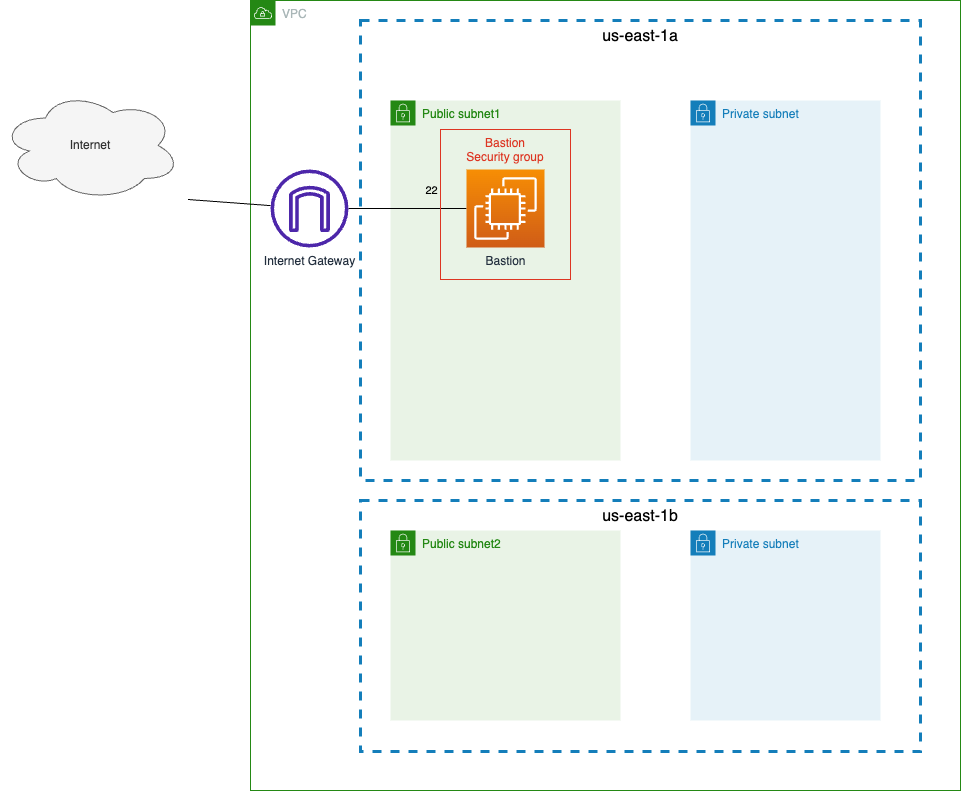
環境の初期化
CloudFormation を使用して環境を初期化します。
初期化後の環境は以下のようになります。
CloudShell を起動する
以下のコマンドを実行して、CloudFormation のテンプレートファイル(template.yaml) を CloudShell 上にダウンロードする
curl -sL https://raw.githubusercontent.com/cupperservice/aws-hands-on/main/docs/hands-on/05.RDS%E3%82%92%E8%A7%A6%E3%81%A3%E3%81%A6%E3%81%BF%E3%82%8B/cfn/template.yaml -o template.yaml
環境を初期化
以下のコマンドを実行して環境を初期化します。
aws cloudformation create-stack \
--stack-name rds \
--template-body file://template.yaml
RDS を作成する
セキュリティグループを作成する
以下の項目を入力する
| Item | Value |
|---|---|
| Security group name | rds security group |
| Description | for rds |
| VPC | MyVPC |
Inbound Roles に以下のルールを追加
| Type | Port | Source |
|---|---|---|
| MYSQL/Aurora | 3306 | bastion security group |
サブネットグループを作成する
以下の項目を入力する
| Item | Value |
|---|---|
| Name | my subnet group |
| Description | for rds |
| VPC | MyVPC |
Add subnets で以下を設定する
| Item | Value |
|---|---|
| Availability Zones | - us-east-1a - us-east-1b |
| Subnets | - Private-subnet1 - Private-subnet2 |
RDS を作成する
以下の項目を設定して RDS を作成する
Choose a database creation method
- Standard create
Engine options
- Aurora (MySQL Compatible)
- Engine Version: Aurora MySQL 3.03.1 (compatible with MySQL 8.0.26)
Templates
- Dev/Test
Settings
| DB instance identifier | MyRDS |
| Master username | admin |
| Master password | password00 |
| Confirm master password | password00 |
Cluster storage configuration
- Aurora Standard
Instance configuration
- Burstable classes (includes t classes)
- db.t3.medium
Availability & durability
- Create an Aurora Replica or Reader node in a different AZ (recommended for scaled availability)
Connectivity
| Compute resource | Don’t connect to an EC2 compute resource |
| Network type | IPv4 |
| Virtual private cloud(VPC) | MyVPC |
| DB subnet group | my subnet group |
| Public access | No |
| VPC security group (firewall) | rds security group default はチェックしない |
Database authentication
- どれもチェックしない
Monitoring
| Monitoring | Enable Enhanced monitoring のチェックを外す |
Additional configuration
* データベース名にハイフンが入っていると作成できないのでここではデータベース名は指定しない
* データベースはデータベースにデータを投入するで作成する
データベースにデータを投入する
CloudShell から データベースへ bastion サーバを経由した SSH トンネリングを確立する
CloudShell で mysql コマンドを使用してデータベースに接続し、以下の SQL を実行する
接続するデータベースのエンドポイントは Writer のエンドポイント
Reader, Writer のそれぞれに接続する
以下の SQL を Reader, Writer のそれぞれで実行する
select a.first_name, a.last_name, avg(score)
from student a, score b
where a.id = b.student_id
group by a.id;
show variables like "innodb_read_only";
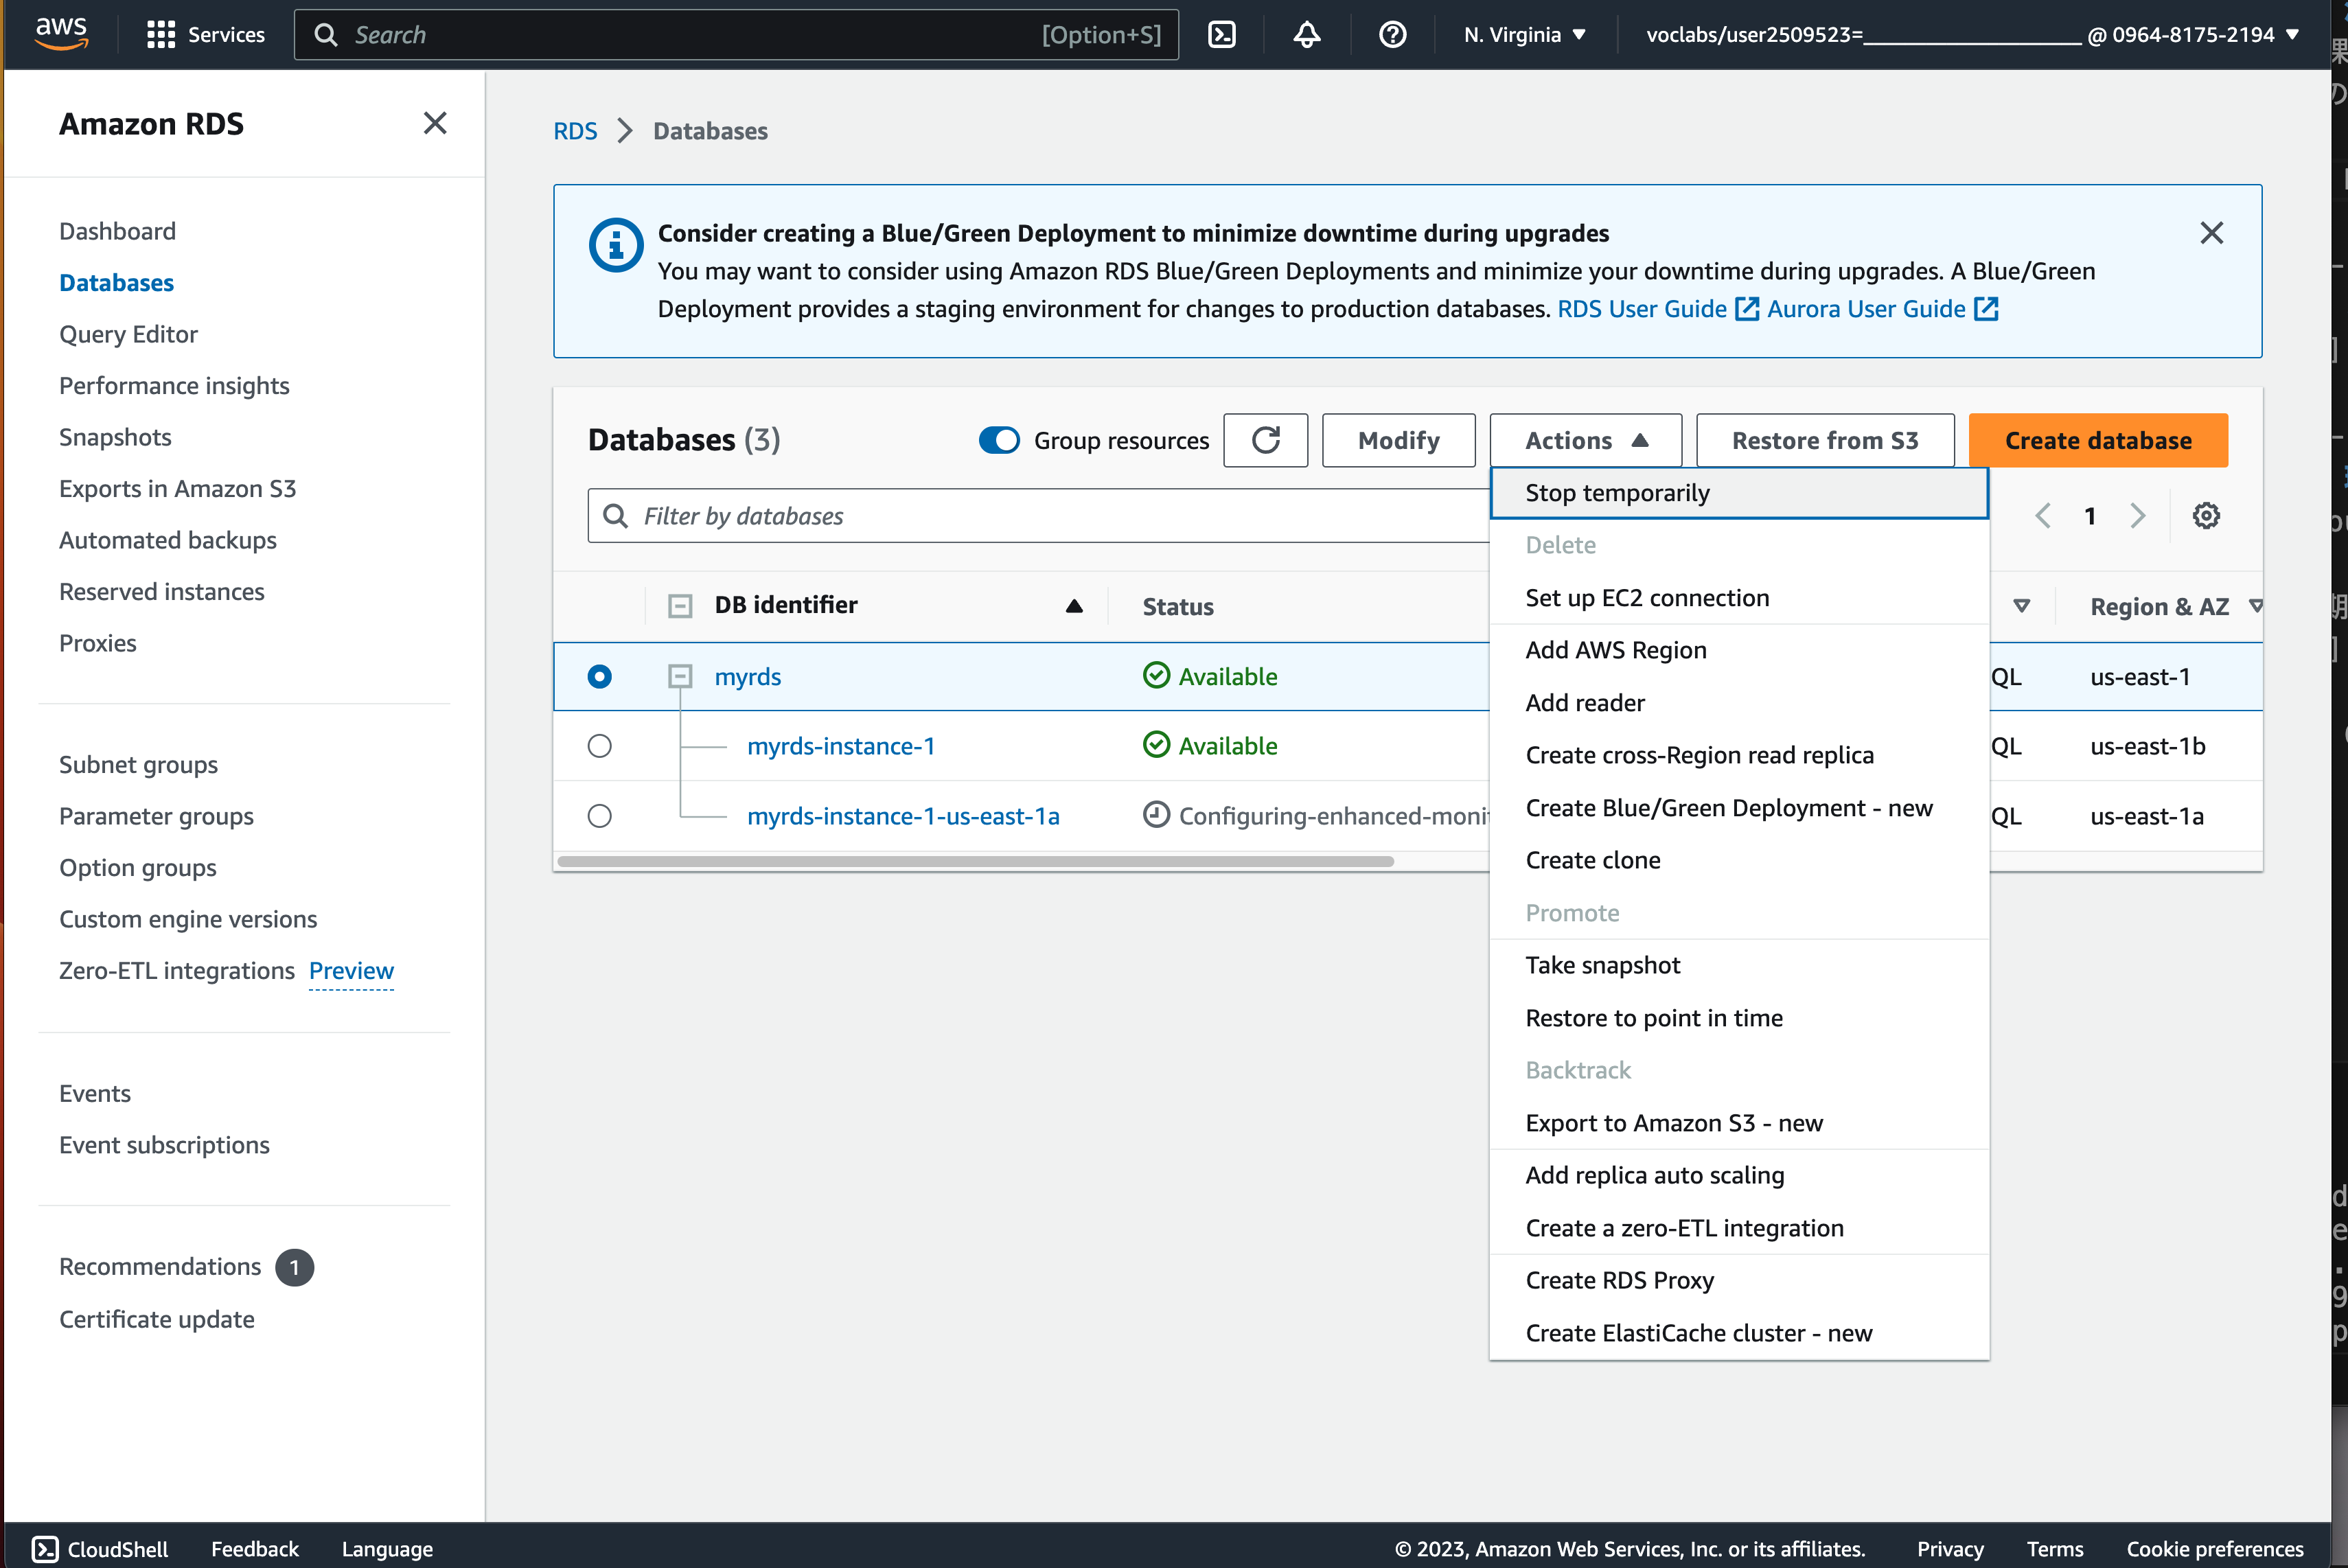
フェールオーバー
データベースをフェールオーバーし Writer と Reader を入れ替える
RDS の画面の一覧で Reader インスタンスを選択する
Actions -> Failover
RDS の画面の一覧の Role で Writer と Reader が入れ替わったことを確認する
以下の SQL を Reader, Writer のそれぞれで実行する
show variables like "innodb_read_only";